Widgets
Widgets are web-based components within a window (frame) that allow direct interaction with web page users and the Business Bot platform. The platform offers various widgets, which can be integrated multiple times into various websites. A widget instance must be created for each web page so that it can be uniquely identified with a key and integrated into a webpage.
| Widget Name | Description |
|---|---|
| UserRegistration | Direct registration of new users |
| SendMessageToChannelUser | Send a message to a previously defined mobile user |
| SendMessageToChannelUsers | Send a message to a previously defined group of mobile users |
Widget Instances
What is a widget instance?
A widget instance is a widget object that is created for a specific purpose. For example, a customer registration widget for product improvements. A widget instance may require a mobile user account and a bot instance to allow the message delivery to another mobile users. This could be the case, when web-users want to inform a group of administrators about unavailable system services using the notification widget.
Create Widget Instance
You can create a widget instance using the following web form:
Navigation bar: Widgets → Widget Instances → Create Widget Instance
The following data is required to create the widget instance:
| Parameter | Example value | Description |
|---|---|---|
| Widget type | UserRegistration | Kind of widget |
| Description | Webpage of the design team | Short description of the purpose |
| Should be active? | Yes | Operating condition |
Modify Widget Instance
You can modify a widget instance using the following web form:
Navigation bar: Widgets → Widget Instances → choose item, then Actions [Settings]
Delete Widget Instance
You can delete a widget instance using the following web form:
Navigation bar: Widgets → Widget Instances → choose item, then Actions [Delete]
The user will be prompted to confirm the delete action.
Widget Integration into a Webpage
The integration of a widget into a web page requires a code segment,
which is embedded in the HTML web page. This code is generated during
creation of a new widget instance and appears on page widget preview of the navigation menu.
On this page, look at the the bottom of the widget in the section Embed to webpage.
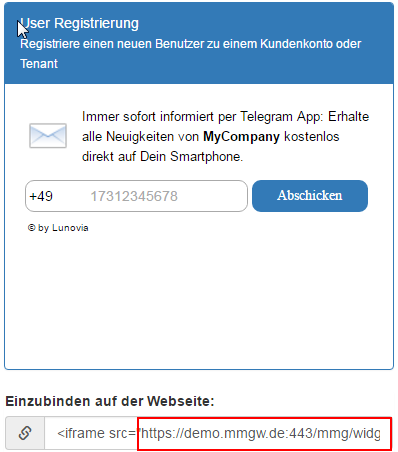
1 | <iframe src="https://demo.bbp.local/bbp/widget/689547f9-2124-4d6e-b0df-fabf753143d6" frameborder="0" width="100%" height="250" scrolling="no"></iframe> |
You can embed the code into the web page using the HTML tag <iframe>. In addition to the URL, you
can adjust the width and height of the frame as well as the scrolling behavior of the widget.
Widget Integration in Wordpress
The integration of the widgets in Wordpress requires an additional
plug-in that supports the embedding of the HTML tag <iframe>. Therefore, you have to load
the plugin IFrame Shortcode (from Flyn San) and install it in Wordpress as follows:
In the Wordpress administration interface, click
Plugins → Install → Search for IFrame Shortcode → Install now. (Alternatively, download the plugin from
https://wordpress.org/plugins/flynsarmy-iframe-shortcode/)
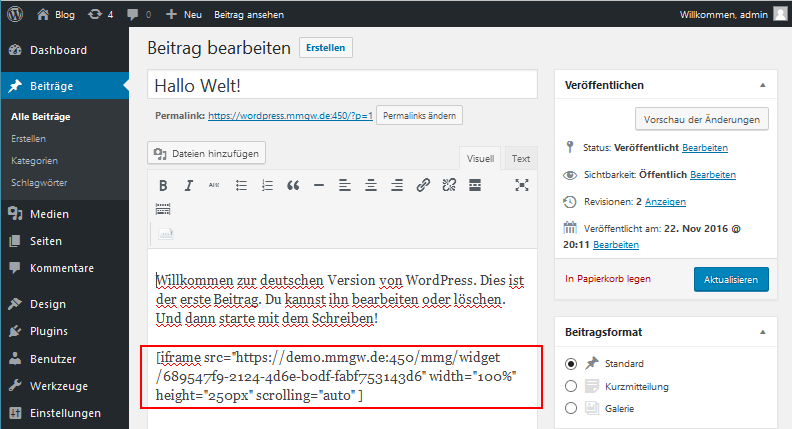
Once the plugin has been installed, you can embed the widget directly on
the desired Page or Post.
The generic syntax is:
1 | [iframe src="http://yoururl.com" width="400" height="600"] |
Working example:
1 | [iframe src="https://demo.bbp.local/bbp/widget/689547f9-2124-4d6e-b0df-fabf753143d6" width="100%" height="250px" scrolling="auto"] |
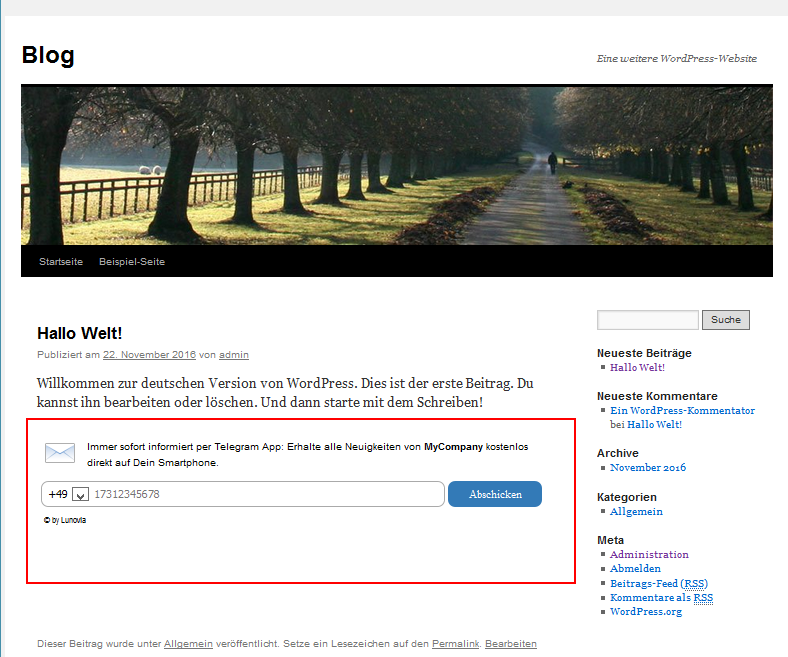
Nachdem der Beitrag abgespeichert wurde, erscheint die Widget-Integration sofort auf der Webseite wie im folgenden Beispiel zu sehen: