Microsoft Skype for Business 2015
The following steps give you an overview of the steps required to create a bot account for Microsoft Skype for Business 2015. Since there are various configuration options for creating new users for Microsoft Skype for Business 2015, the most frequently used way is described as follows.
- Brief overview: The installation takes place in two steps:
-
- Create new user account in Microsoft Skype for Business 2015
- Create a new bot account on the Business Bot Platform
Step 1: Create new user account in Microsoft Skype for Business 2015
This section assumes that an installed Microsoft Skype for Business 2015 environment with Active Directory exists. The following servers are required:
- SFBAD - Hostname
sfbad.vs.com(Microsoft Skype for Business - Active Directory-Server) - SFBFE - Hostname
sfbfe.vs.com(Microsoft Skype for Business - Frontend-Server)
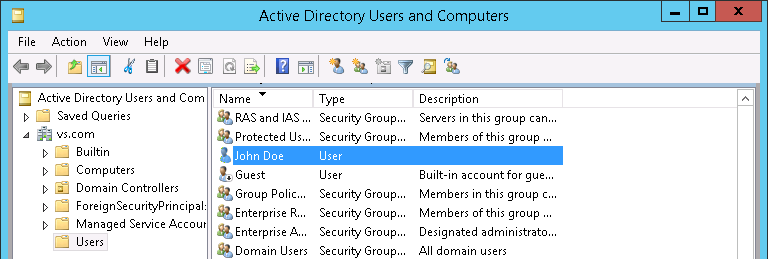
On the Microsoft Skype for Business Active Directory server, start the Server Manager and select
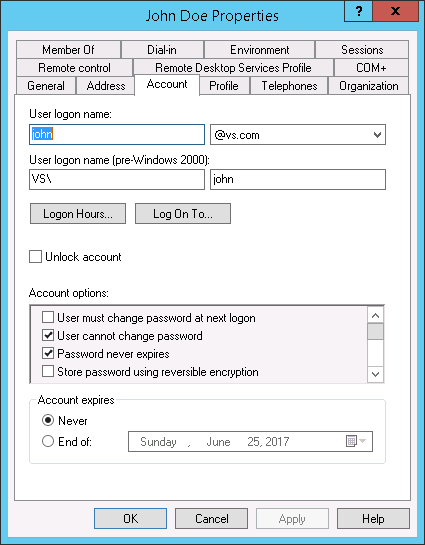
Tools → Active Directory Users and Computer. Now create a new Active Directory user (for example, user
John Doe) with following settings:
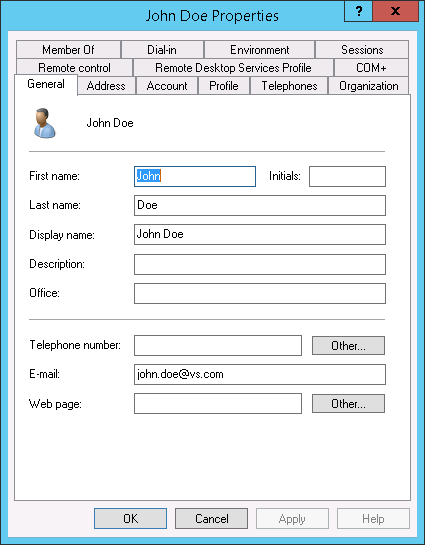
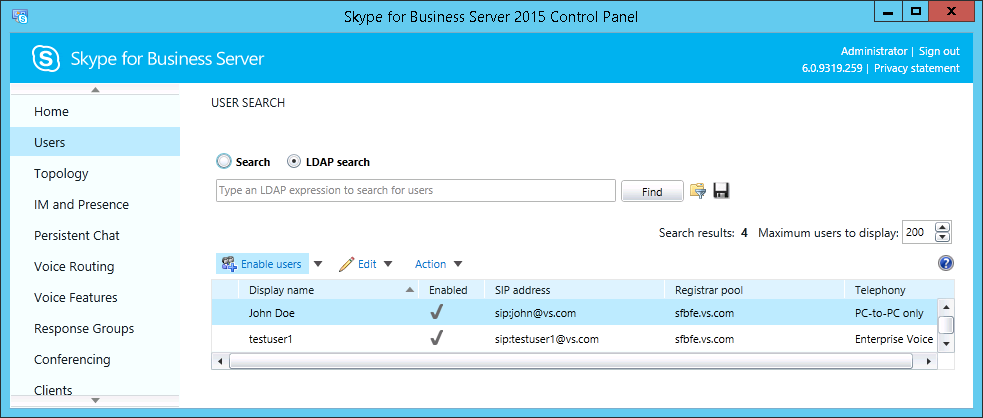
Add missing information such as the user's e-mail address (tab: General → field
E-mail) required when logging in to the server using the Skype for Business Client. The newly created user now
appears in the list of users.
Go to the Microsoft Skype for Business front-end server to register the
newly created Active Directory user as a Skype user. To do this, start
Skype for Business Server 2015 Control Panel via Start → Programs.
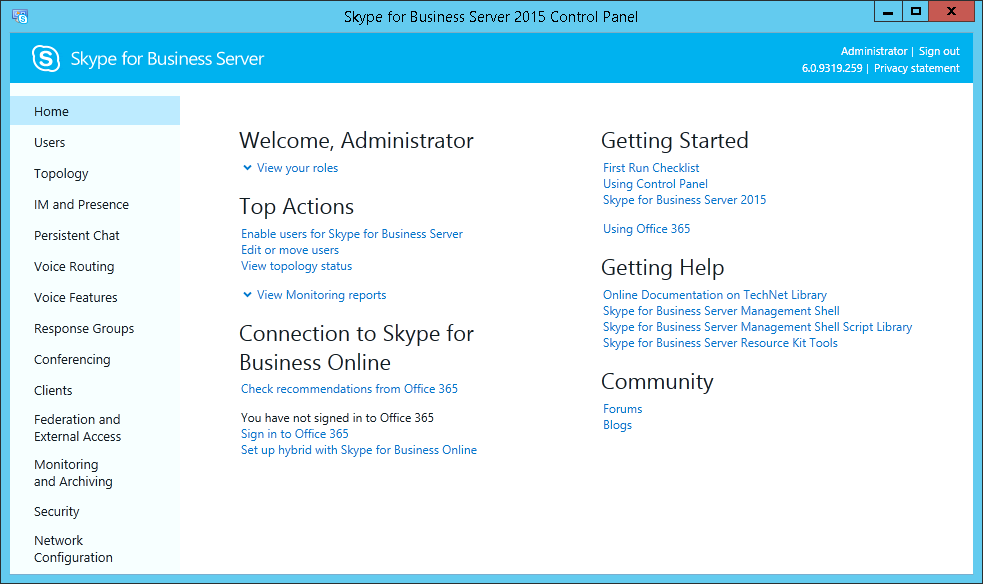
Now select from the nagivation bar Users → Enable users → Add... and look for the newly created
user John Doe.
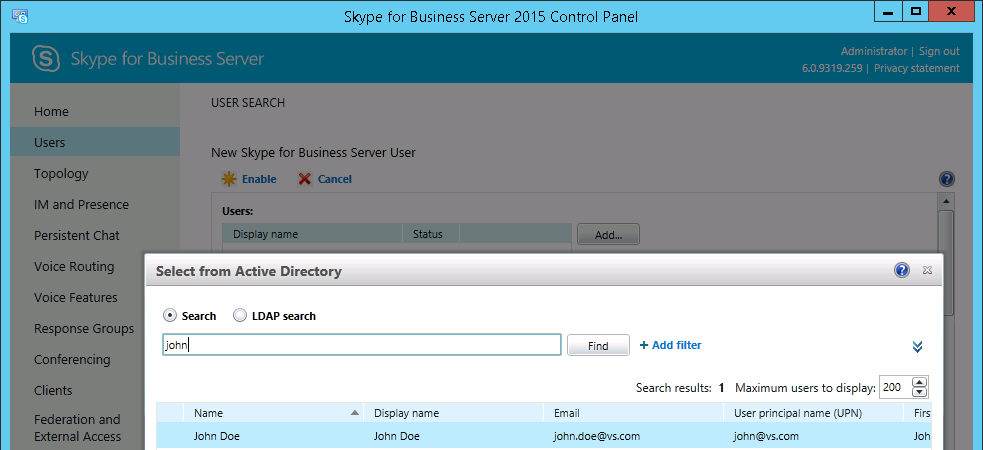
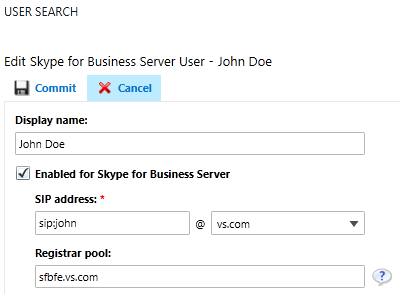
Now select user John Doe and click on OK. In the field Assign user to a pool, choose the pool to which the user should belong and the type of authentication
(Use the following format: <SAMAccountName>@vs.com), subsequently confirm the values by clicking on
Enable.
The SIP address of the user (john@vs.com - without SIP suffix) and the password are now required in the next step
to create a new bot account on the Business Bot Platform.
Step 2: Create a new bot account on the Business Bot Platform
-
Login to the Business Bot Platform:
- PublicCloud users use the URL: https://my.bbp.local/
- PrivateCloud users use the URL: https://mysuffix.bbp.local/
-
Choose
Chatbot Administration→Instant Messenger Accounts→Create Bot Account. The following data is required to create the bot account:Field Example value Name: MySFBBotKonto Description: BotKonto for department Z Instant Messenger: Skype for Business -
The bot account has been created and must still be configured with the instant messenger account information. To do this, click on the icon
Settingsand modify the following parameters:Required Fields Description Example value SkypeForBusiness.Discovery.Host Discovery Host lyncdiscover.vs.com SkypeForBusiness.Discovery.Url Discovery URL https://lyncdiscover.vs.com/ SkypeForBusiness.UserAgent User Agent BBP Client For UCWA SkypeForBusiness.OperationId Operation Identifier 74cb7404e0a247d5a2d4eb0376a47dbf SkypeForBusiness.Ext.Pool.Host External Pool Host sfbfe.vs.com SkypeForBusiness.Ext.Pool.Url External Pool URL https://sfbfe.vs.com SkypeForBusiness.X.MS.Origin.Header BBP Application URL http://dev.vs.de:90 SkypeForBusiness.Authentication.User E-Mail address for authentication john@vs.com SkypeForBusiness.Authentication.Password Password for authentication Password1 SkypeForBusiness.Authenticated.XFrameUrl Cross-domain frame used for web-based applications https://lyncweb.vs.com/Autodiscover/XFrame/XFrame
The user account for the bot is now configured and will be used later when creating a bot for Microsoft Skype for Business.